Setting Up an Archiva Repository and Deploying Artifacts with Jenkins
As the number of internal projects started to grow here at EverTrue, dependency management became a frustrating, time-consuming, and monotonous process.
Our backend framework has a lot of branching dependencies, and this complex network of connections led to several issues:
- Updating a project’s dependencies was a slow and manual process
- This process unnecessarily shifted developer focus, interrupted their workflow, caused confusion, and brought up synch issues
- Every dependency had to be kept open and loaded into Eclipse to be recognized, even if they weren’t being edited at the time
The need for a Maven repository to store and update our project dependencies became quite urgent.
In the interest of streamlining our workflow, we managed to set up a very useful system for keeping our dependencies updated automatically.
As a result, a developer here no longer has to worry about dealing with projects outside the scope of their current project, or working with outdated dependencies.
The solution we found came in the form of a build artifact repository manager called Archiva; it gave us all the right tools to fix our process and is now saving us a fair amount of hassle.
While setting up our repository server we ran into several problems, and compiled a how-to guide on getting everything running. We wanted to share this guide with other developers in the hopes that it makes the process easier for them. Some of the information we found online for our setup was either outdated or buried deep in documentation, spread across several sites. We hope these steps for setting up an Archiva dependency management system with automatically-deployed Jenkins build artifacts are comprehensive, easy to follow, and are as helpful for you as they were for us!
Step-by-step guide:
1. Download
Download Archiva from their site and unzip the file to a directory of your choice. If installing on a networked box just scp the folders over (an example location could be at /home/alex/apache-archiva-2.0.1)
2. Starting Archiva
To start the server, go to the root Archiva folder and use the following command: sudo ./bin/archiva console.
If you want to change the default port the server runs on, go to conf/jetty.xml.
On or around line 65 you should see a bit of code that looks like the following:
1
| |
Simply change the default port to be whichever port you wish, and next time you start the server it will run on that port.
It’s also a good idea to tail the Archiva logs while running the server, so that you can see the status of requests/responses on the server’s port.
Be sure to run the server as sudo so that you don’t run into permissions issues.
3. Archiva Admin Setup
The first time you run Archiva, it will ask you to create an admin user (you may need to hit the button in the upper right):
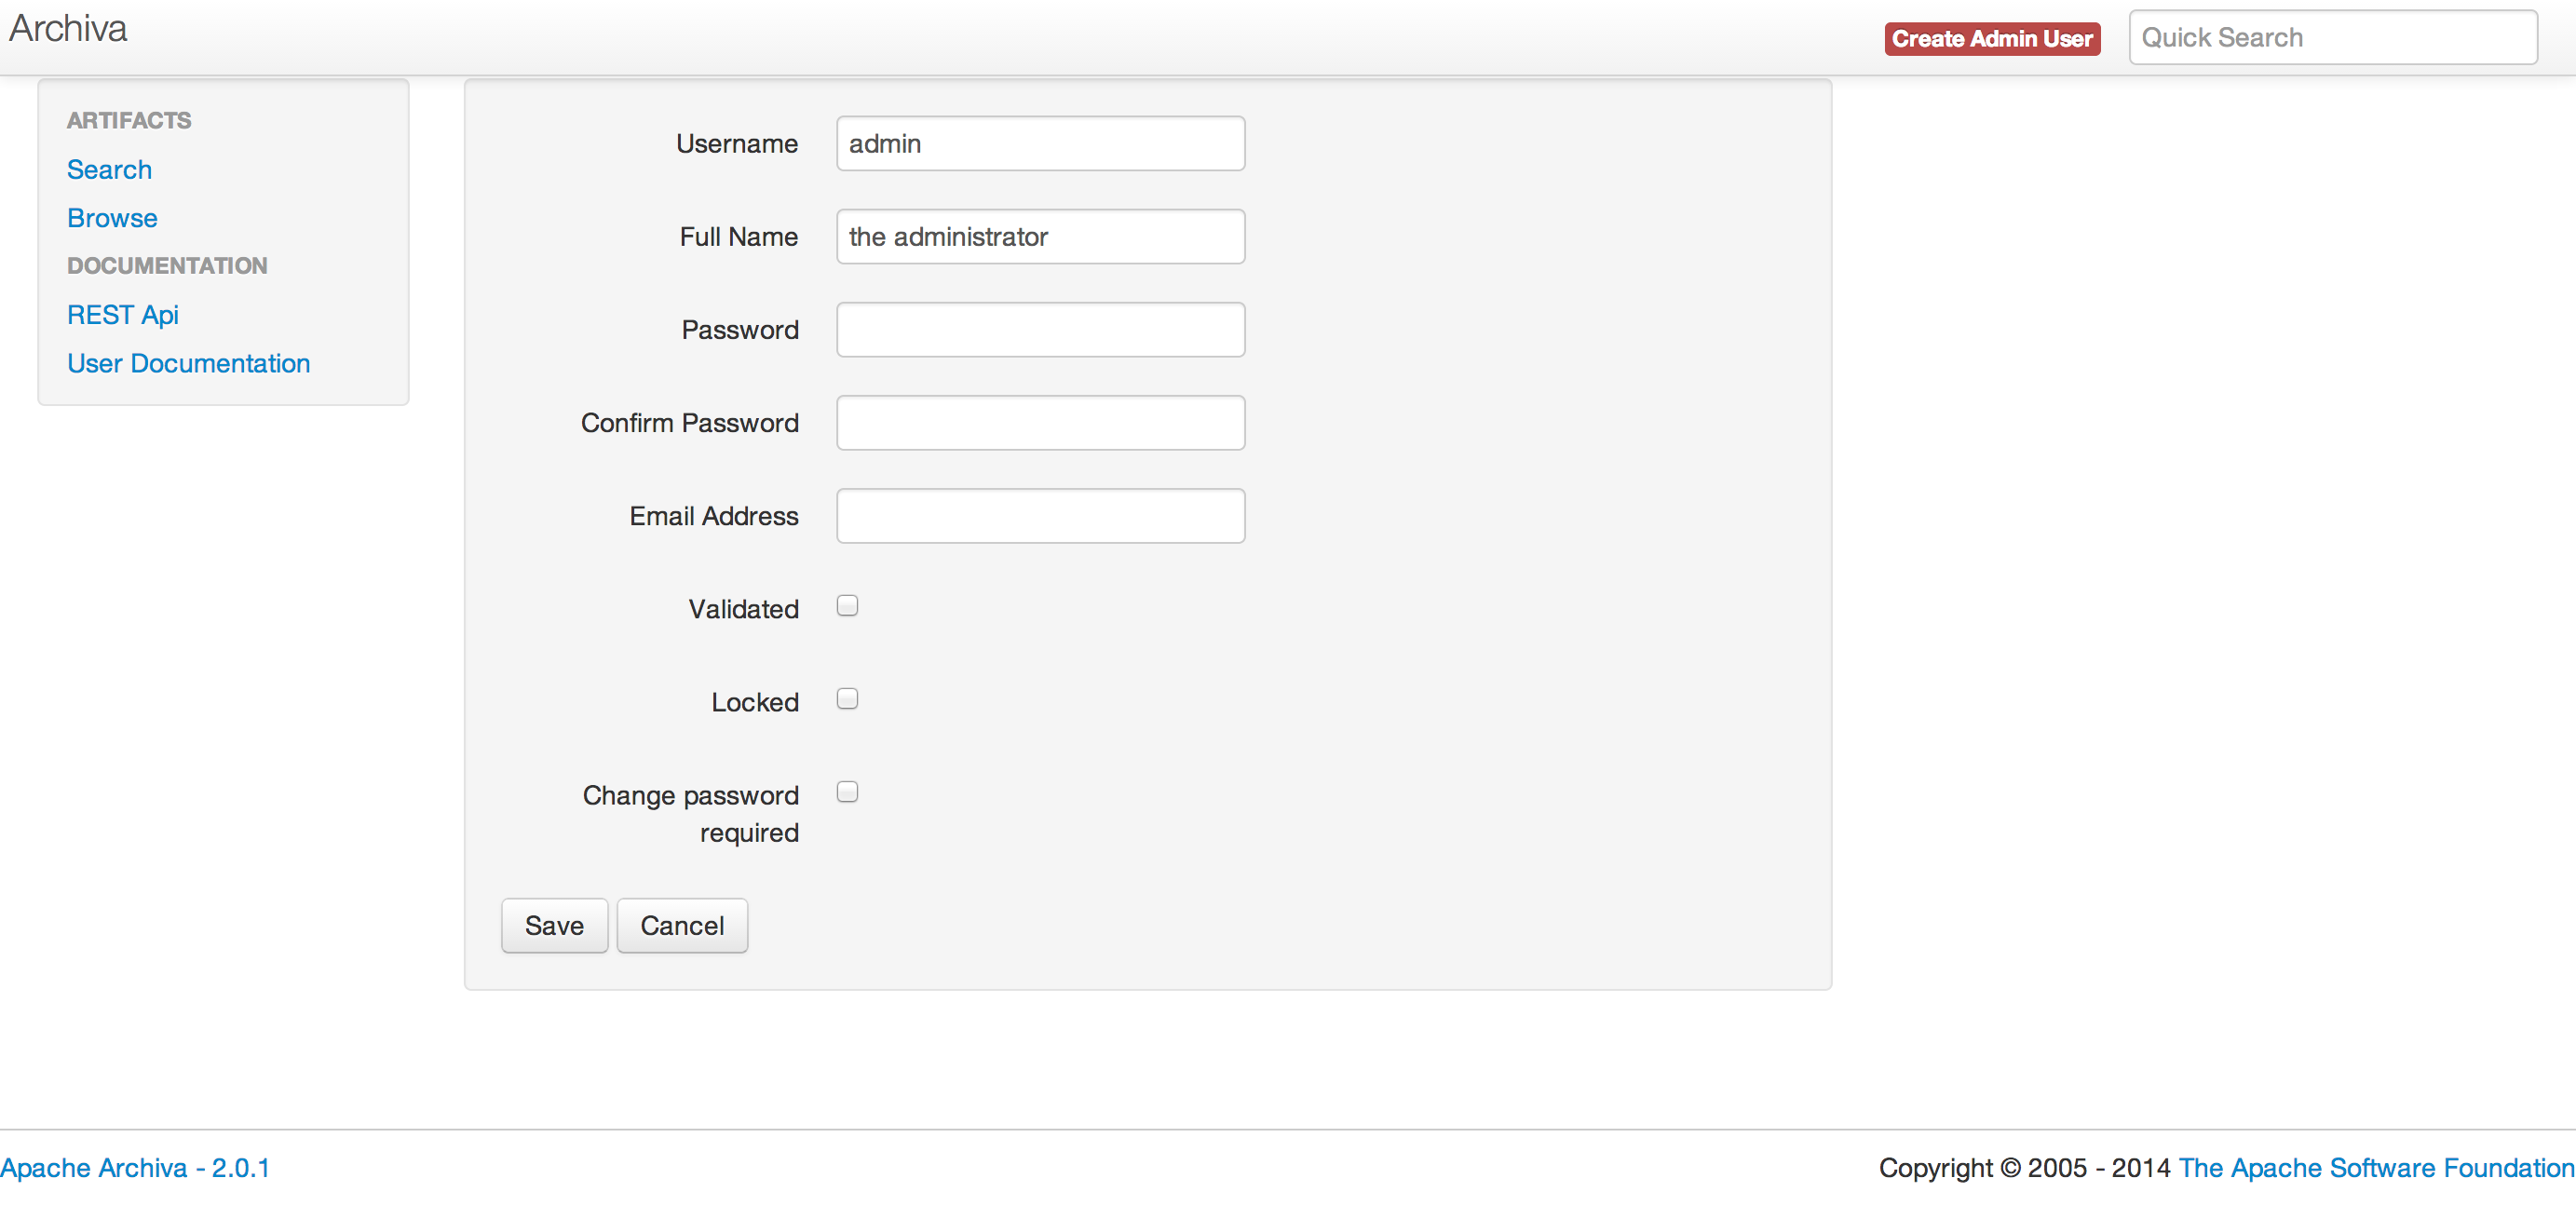
Even though it allows you to change the username, you should not change it. For some reason Archiva only accepts an initial admin user with a username of admin. If you change this while creating the user, it will change the name after saving the account (and won’t tell you that it just did that). It also might give you an error message about incorrect username/password combo, but will still save the account regardless.
The password requires at least one integer.
You should also check the “validated” box, and make sure that you don’t check either the “locked” or “change password required” boxes.
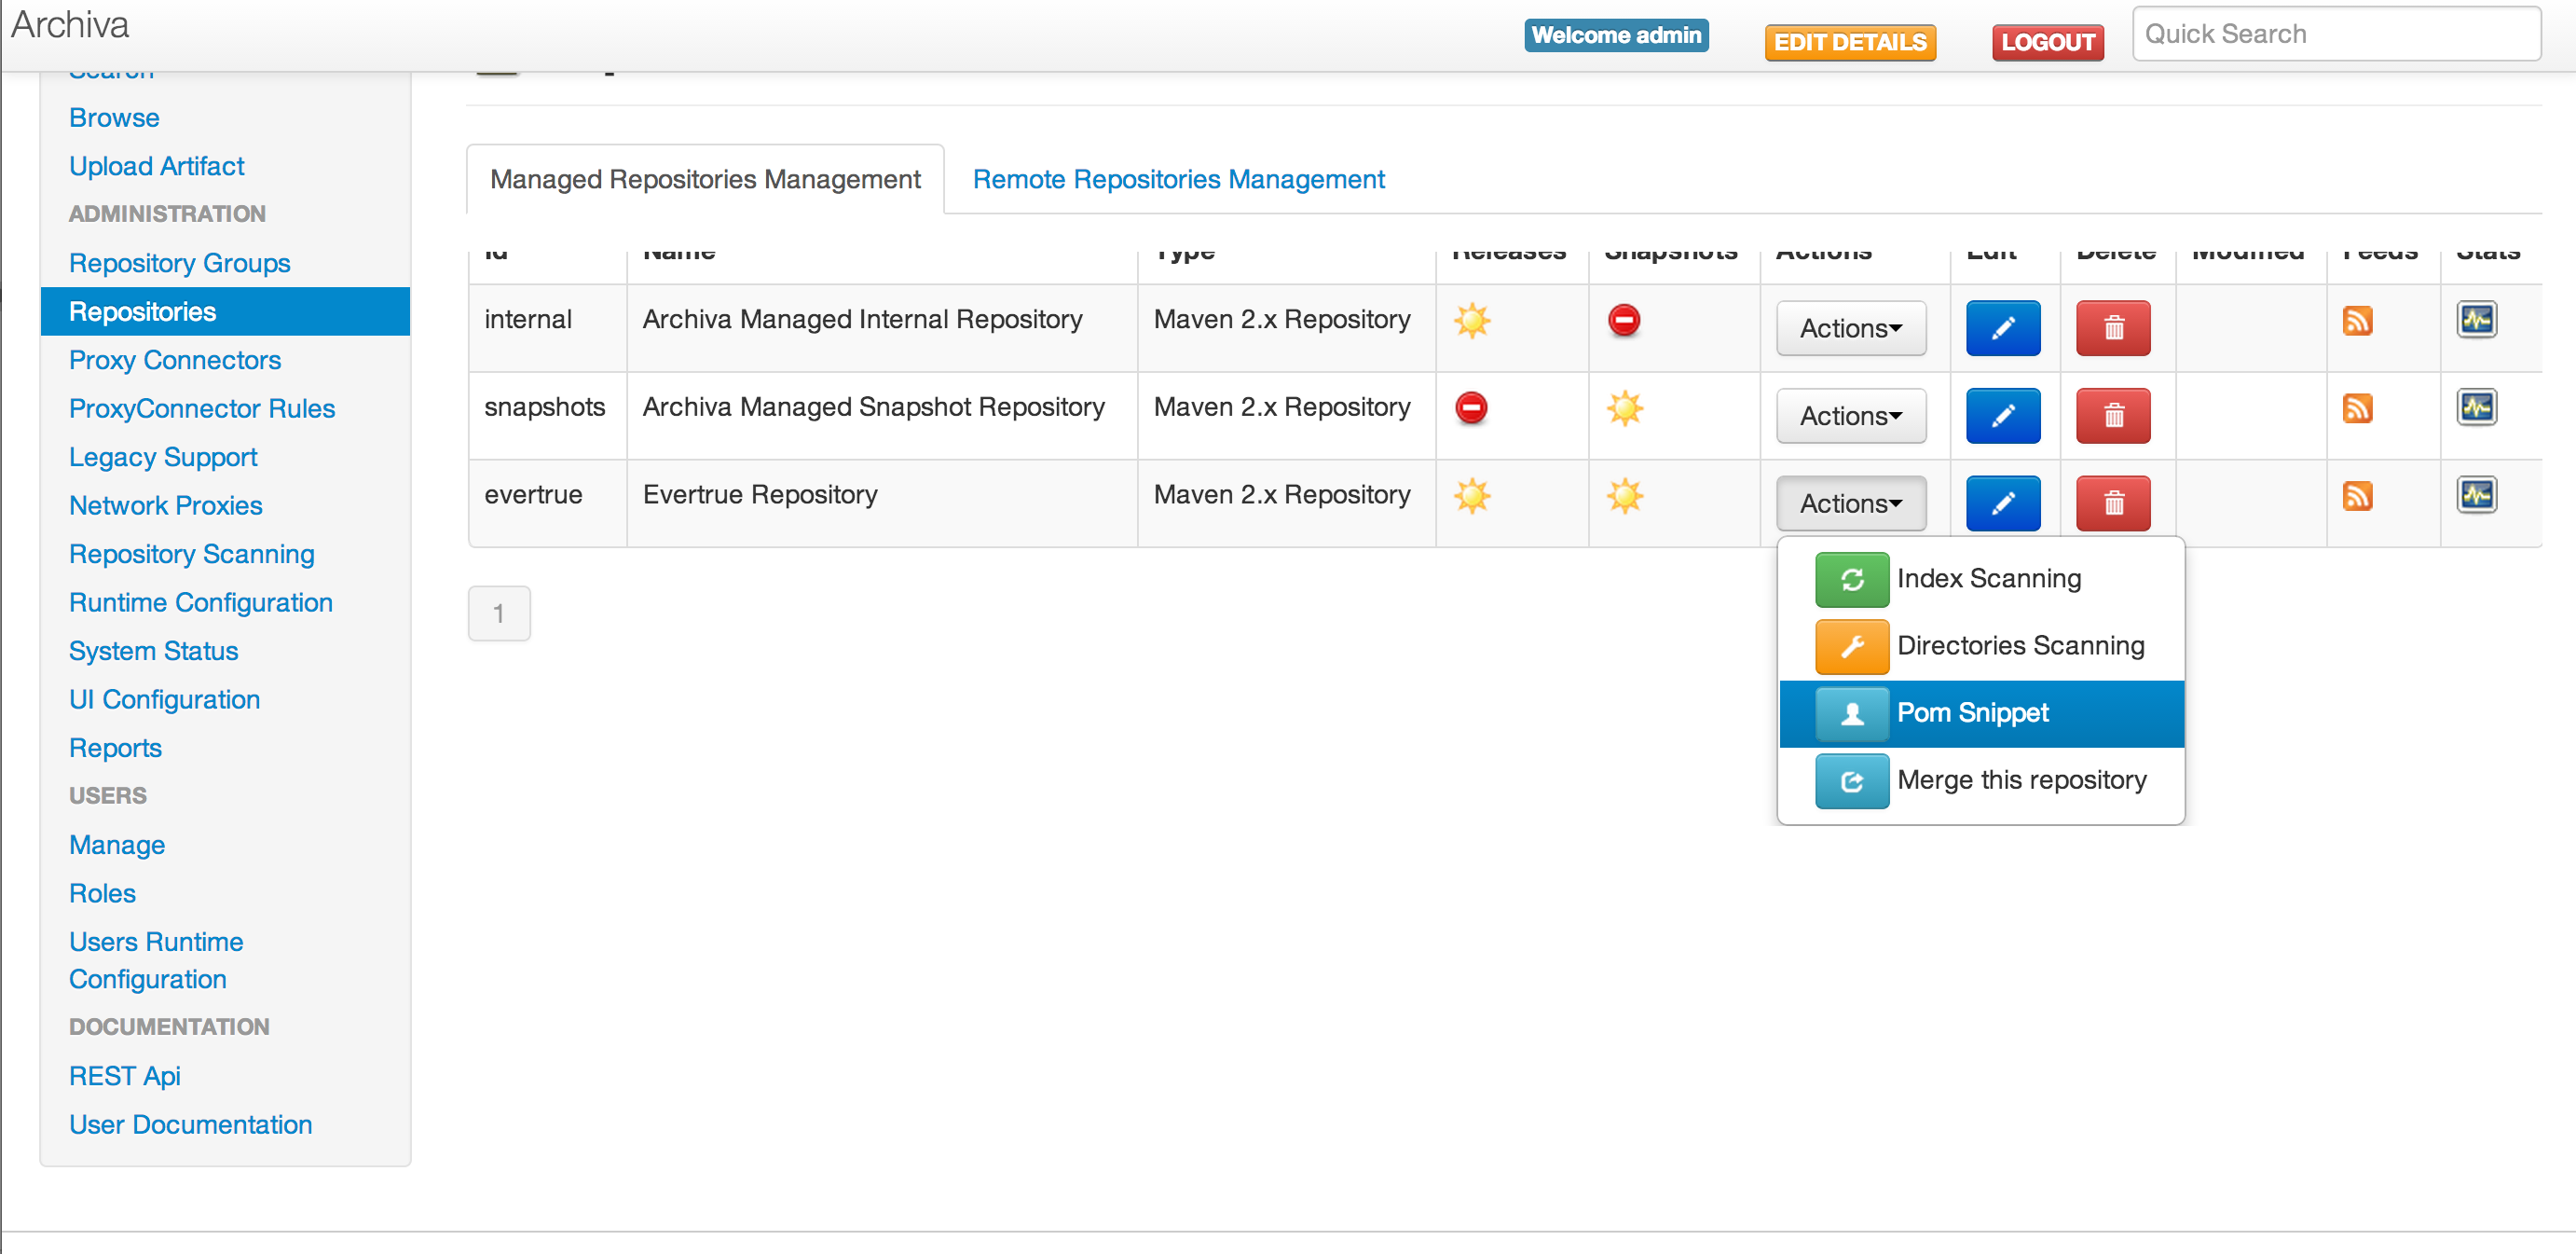
4. New Repository Creation
Archiva comes with two repositories by default, internal and snapshots. We could probably use those for our artifacts, but we want to have our own repository because defaults are lame. Our current repository looks like this:
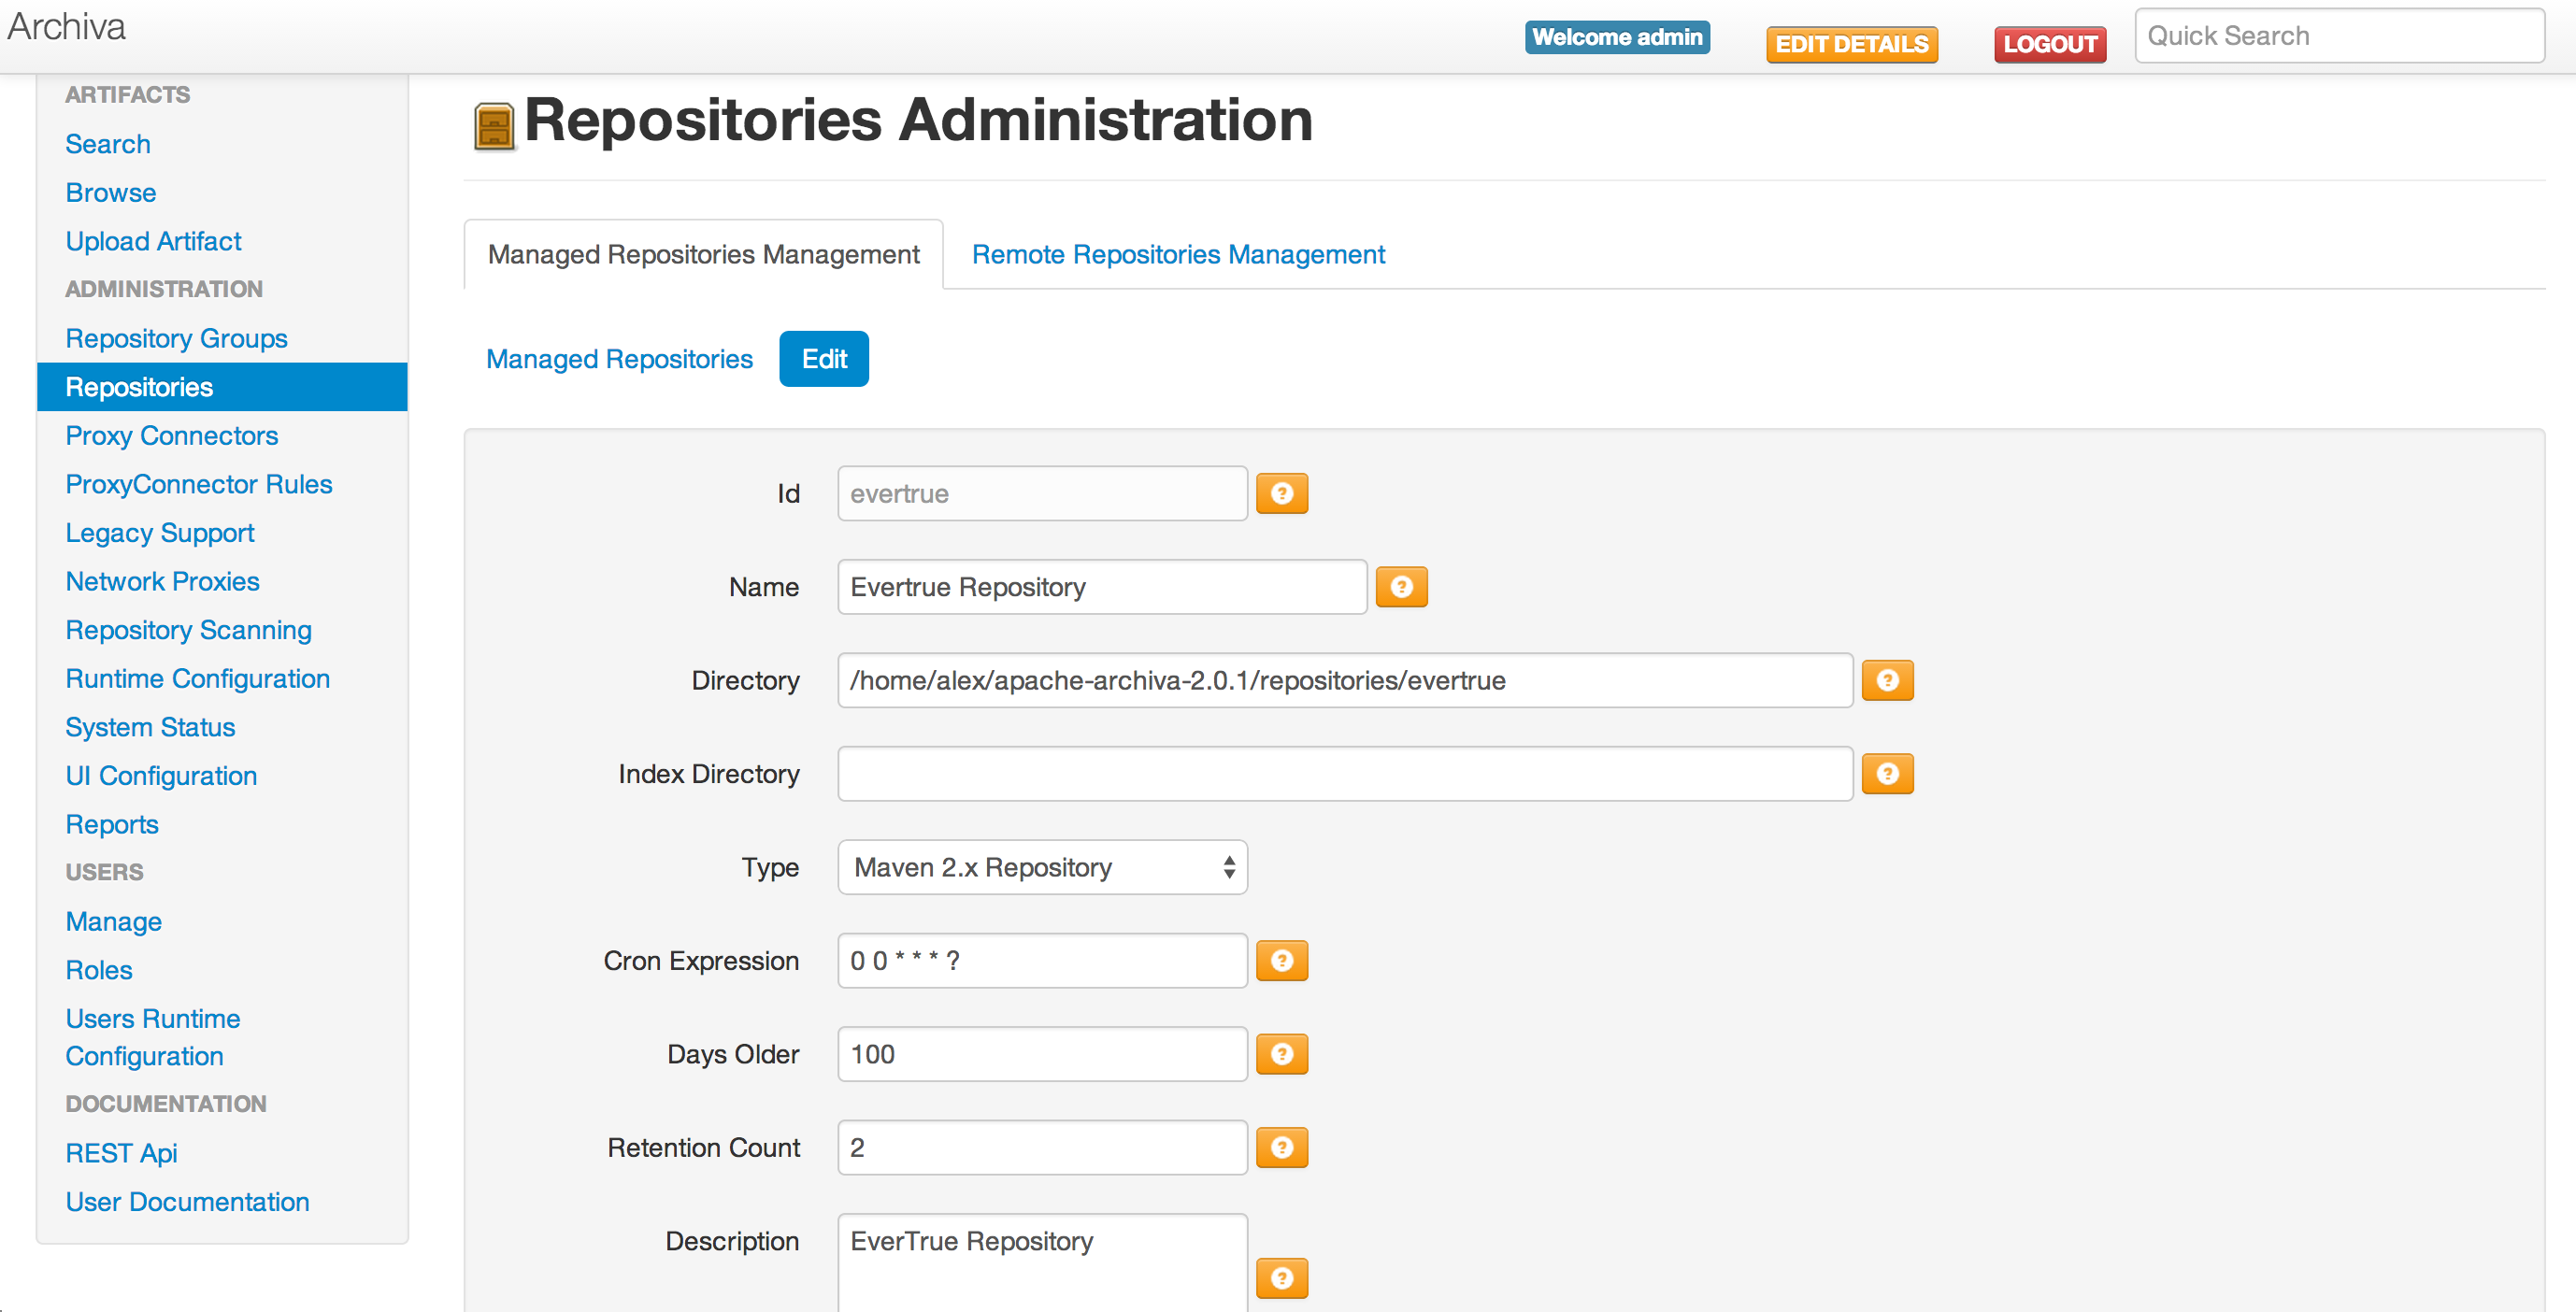
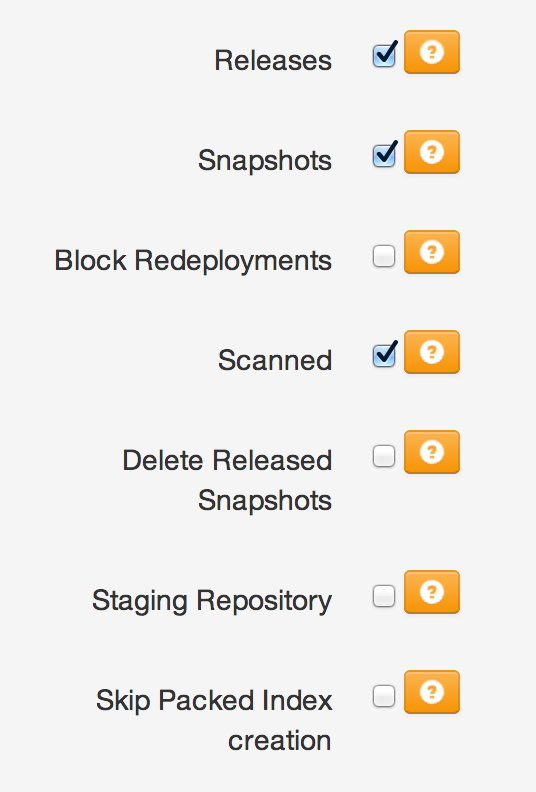
I suggest you mimic these details in the repository you create unless you have a good reason not to.
5. Archiva Configuration and Settings
Next we will need to create a settings file for Maven to reference when publishing to the repository.
Our Jenkins setup uses /var/lib/jenkins/.m2/settings.xml for its default settings file.
We will go through the steps to create the file and its various parts so that you know what to change if necessary.
Create a file called settings.xml and place it into whichever .m2 folder location you have setup for your Maven installation.
On the main repositories page, find the option to generate a pom snippet for your repository and hit it:
You should see a window with a bunch of XML come up. The important part to copy is everything between the <repositories> and <pluginRepositories> tags. Below is what the xml looks like for our current repository:
1 2 3 4 5 6 7 8 9 10 11 12 13 14 15 16 17 18 19 20 21 22 23 24 25 26 | |
If we had more than one repo you would need to add one of these entries for each individual repo set up in Archiva.
Next you will need to create xml for authentication to the Archiva server. Here is an example; be sure that the server ID, username, and password are all exact matches:
1 2 3 4 5 6 7 | |
Once you have these two snippets of code, paste them in the relevant parts of the skeleton settings.xml file below:
1 2 3 4 5 6 7 8 9 10 11 12 | |
If you run into issues with the dependencies of artifacts stored in Archiva, you may need to add additional repo XML for the Maven central repository, although it should know to look there by default. If you do end up needing it, just copy the repository XML and replace the id with central and change the url to: http://repo.maven.apache.org/maven2.
6. Jenkins Configurations
Now that we have the settings.xml configured, we are almost ready to deploy artifacts. In order to do this we will need to do some Jenkins configurations. First, we need to point Jenkins to the right settings file. This way Jenkins will know how to deploy our artifacts and what repositories are available. We have two choices for doing this. We can either put our settings file in the default maven settings directory that Jenkins uses (/var/lib/jenkins/.m2 for our setup), or we can point to a settings file somewhere else. Since the first one is simple enough, I will go through the steps to point to a separate configuration file.
To point to a different settings file, go to “Manage Jenkins” and click on “Configure System”:
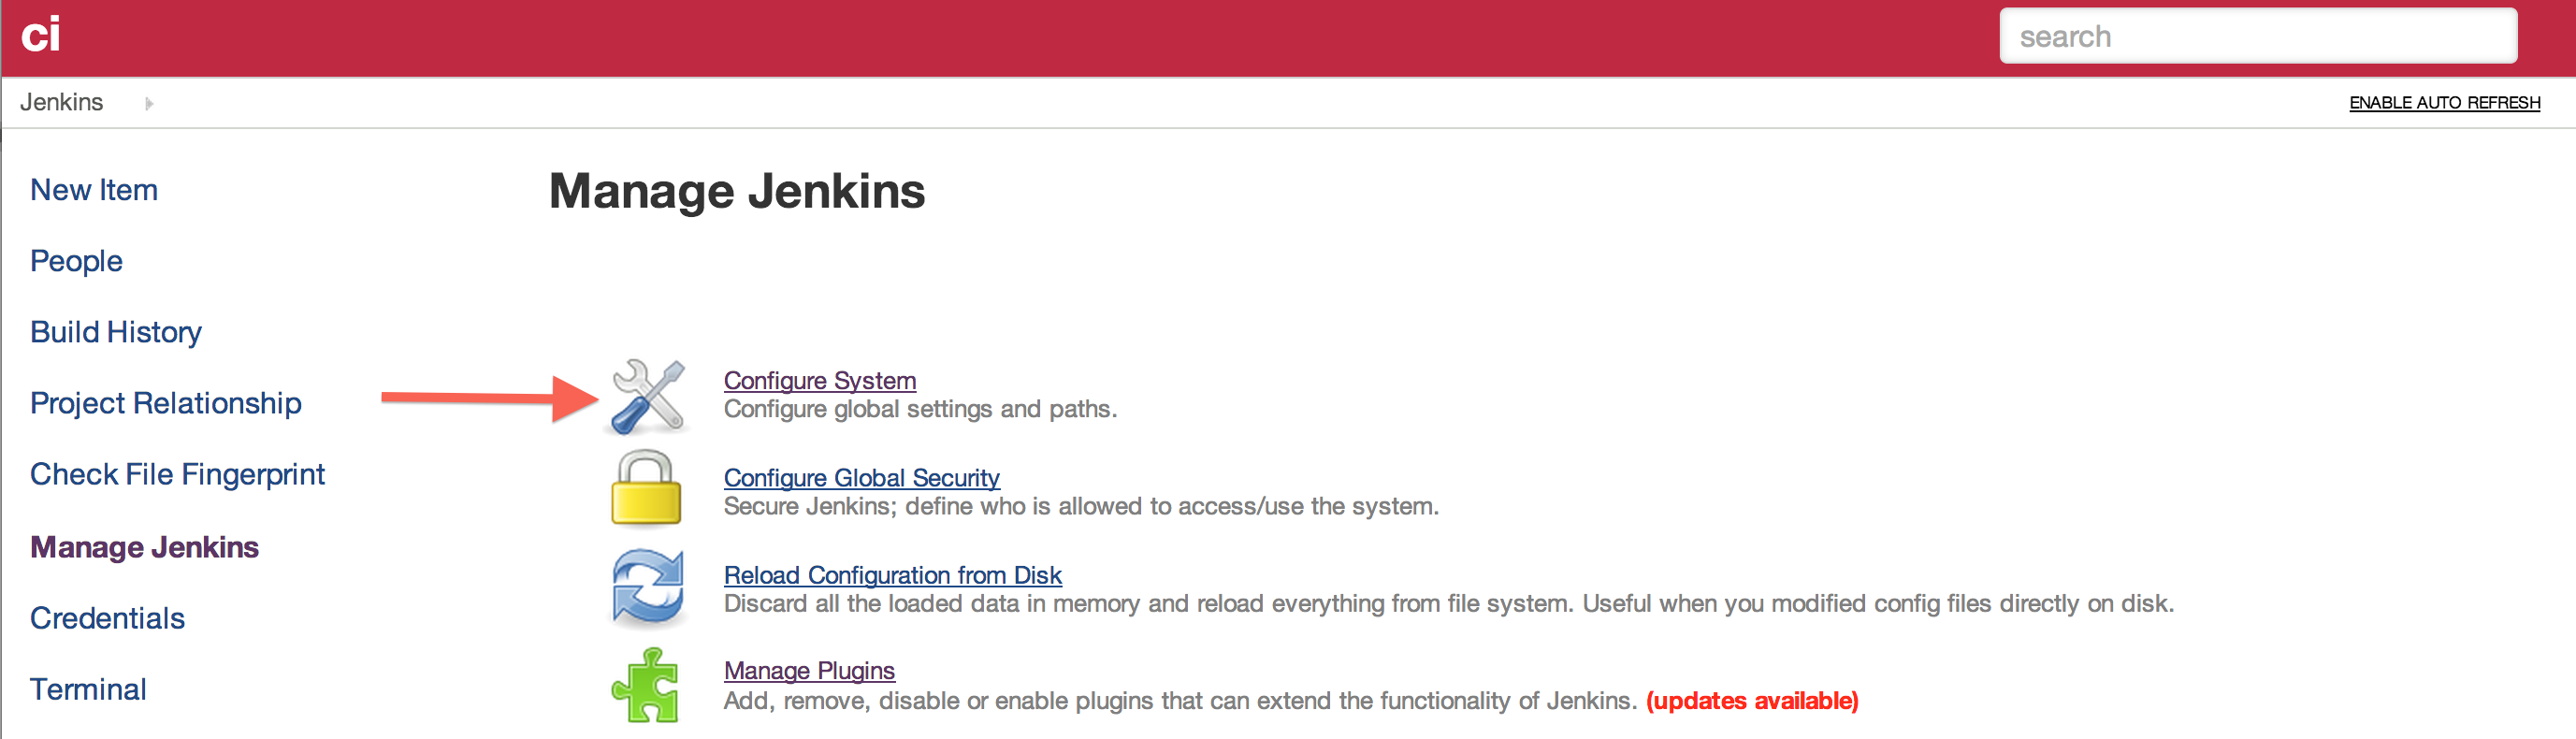
On that page, scroll down to the “Maven Configuration” section. Then simply give the path to the new settings file, and be sure the dropdowns have the “settings file in/on filesystem” option selected.

If you would rather use the default settings file location, simply leave the “use default maven settings” option selected in the dropdown.
7. Deploying Artifacts from Jenkins
To deploy artifacts from a particular Jenkins build, we will need to configure each build individually to point and deploy to Archiva.
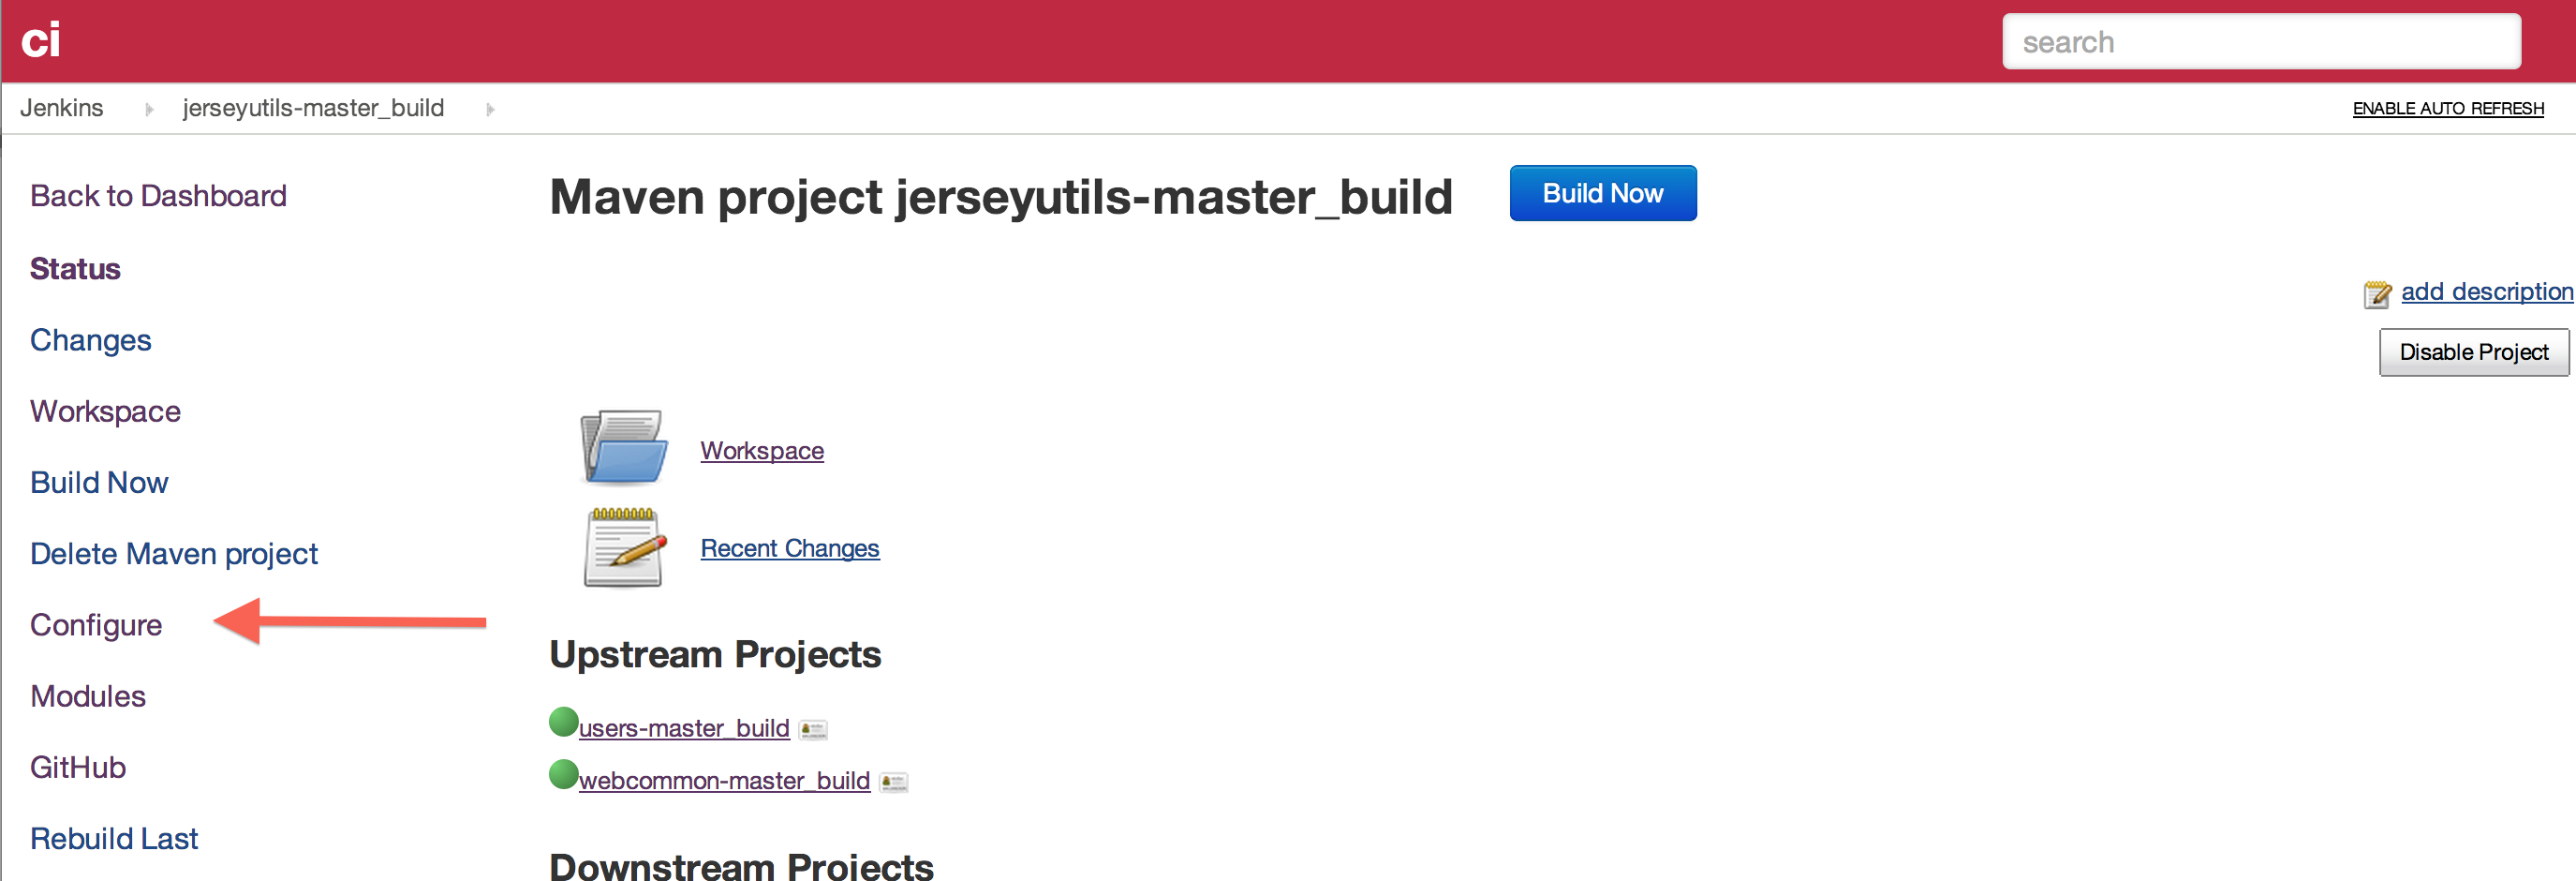
Choose a build to deploy to Archiva. For the purposes of this walkthrough I chose our project jerseyutils-master_build. Go to the build’s home page and select “Configure”:
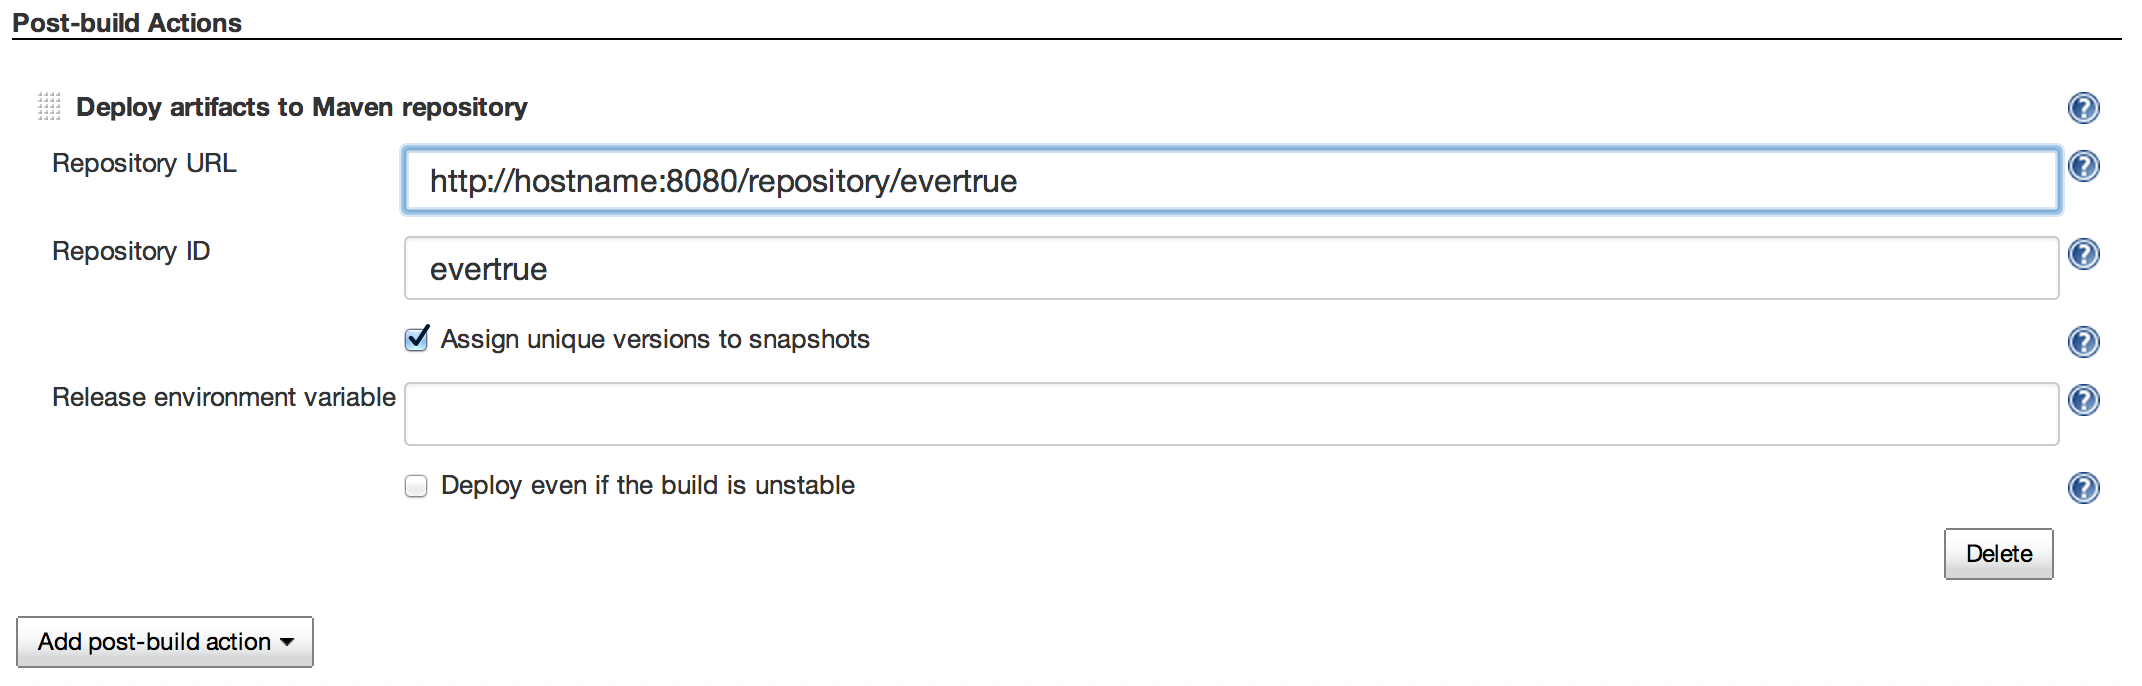
Go to the “Post-Build Actions” section and enter the URL and ID of the repository, ensuring that they match exactly:
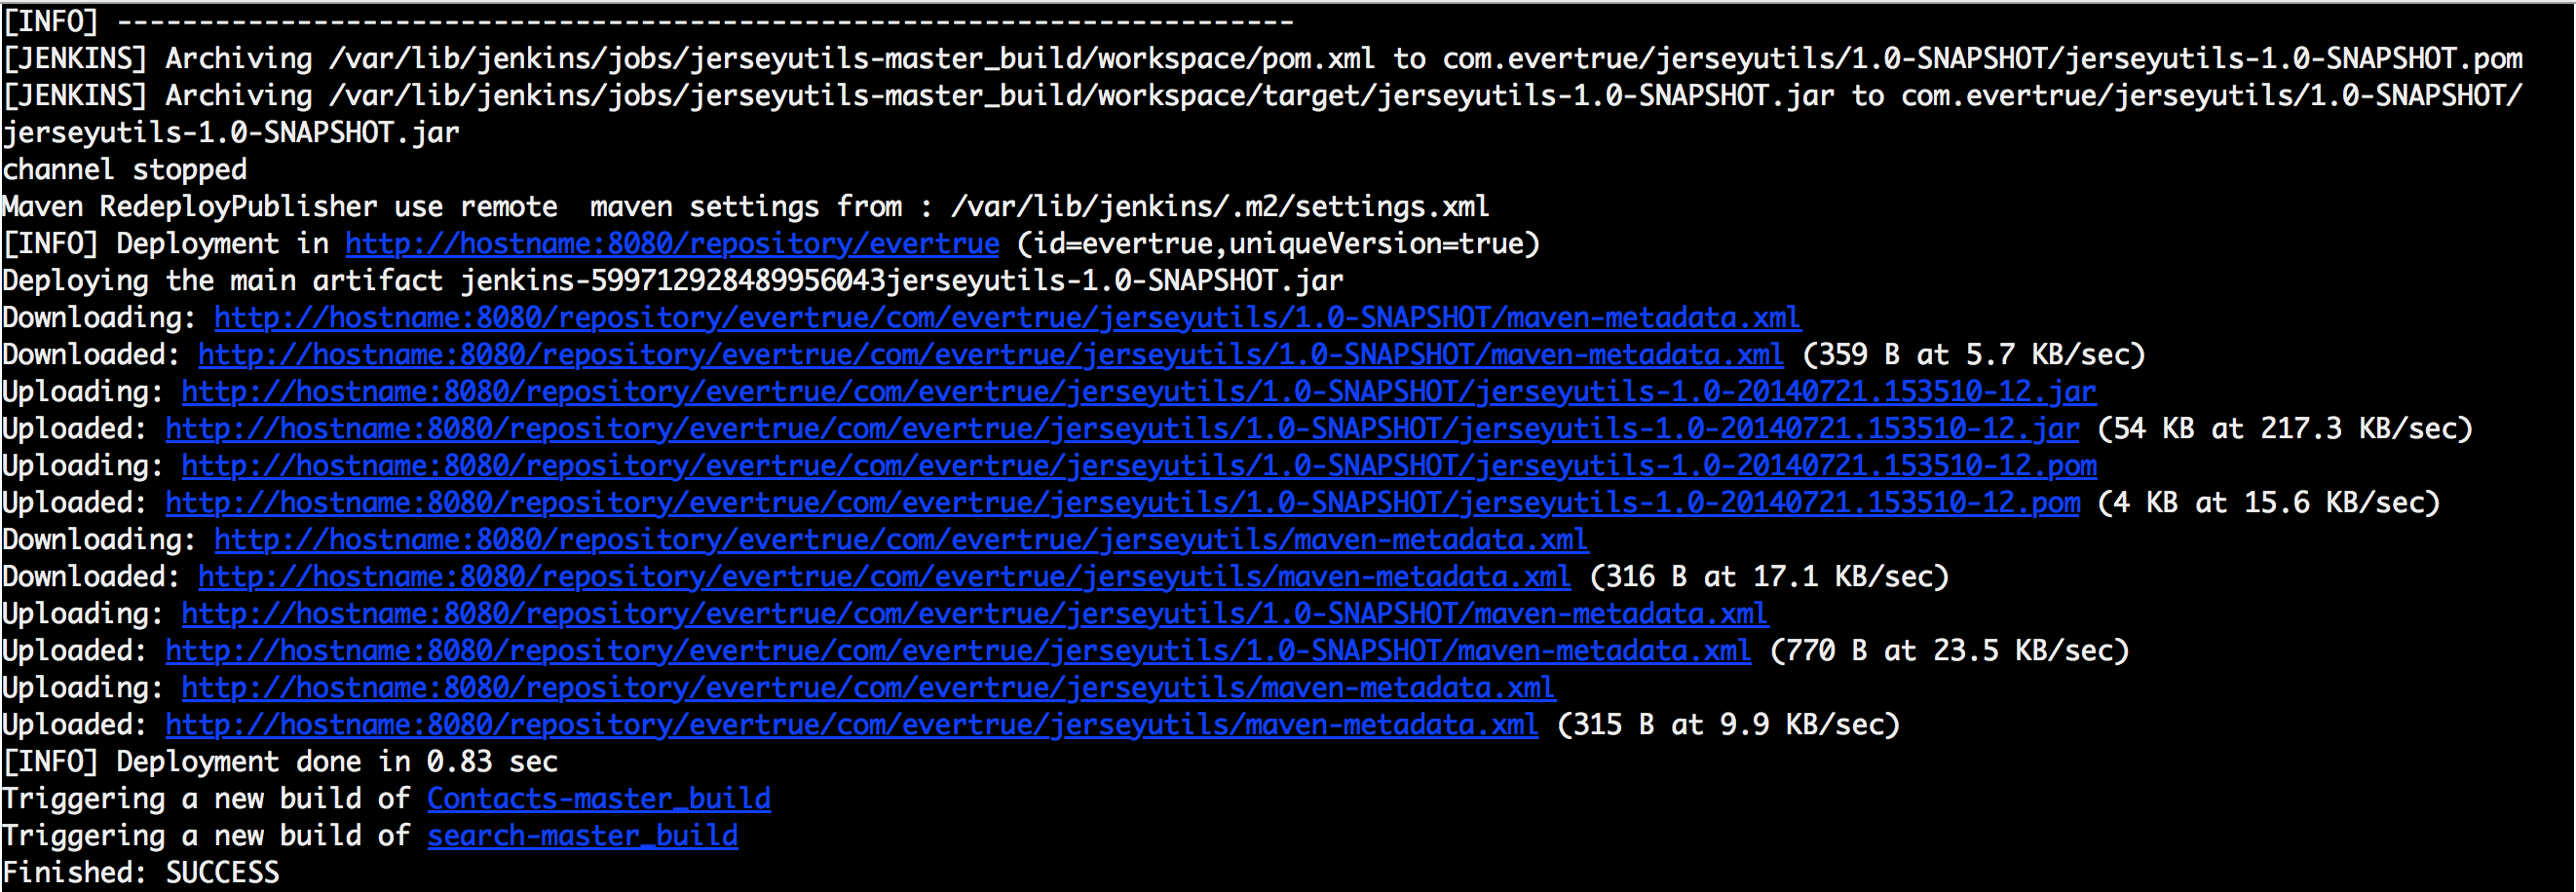
Once the post-build action is completed, you can kick off a build to ensure that Jenkins can successfully deploy all the necessary artifacts to Archiva. Here is an example of a successful build with an Archiva deploy:
If you get a “Connection Refused” error, the Archiva server may not be running, or you may have the wrong configuration. Be sure Archiva is running, has permissions, and that all of your urls and port numbers match up correctly. If you receive a “Not Authorized” exception, then you may have provided the wrong credentials in your settings.xml, or Jenkins may not be using the right configuration file at all. You also could have specified the wrong protocol in the Repo URL in the Jenkins post-build action. Make sure it specifies “http”.
Make sure you repeat these steps for every build you wish to have automatically deploy to Archiva. It’s a pain in the ass, but as long as the info is all correct you should only have to configure once for each build and only change it if there is a change in the repository name or server location.
8. Archiva’s Filesystem
If you want to see the files on Archiva, you can navigate to them in your browser and see when they were last updated/created. This is a good way to know that the files are there and can be useful when debugging:


9. Conclusion
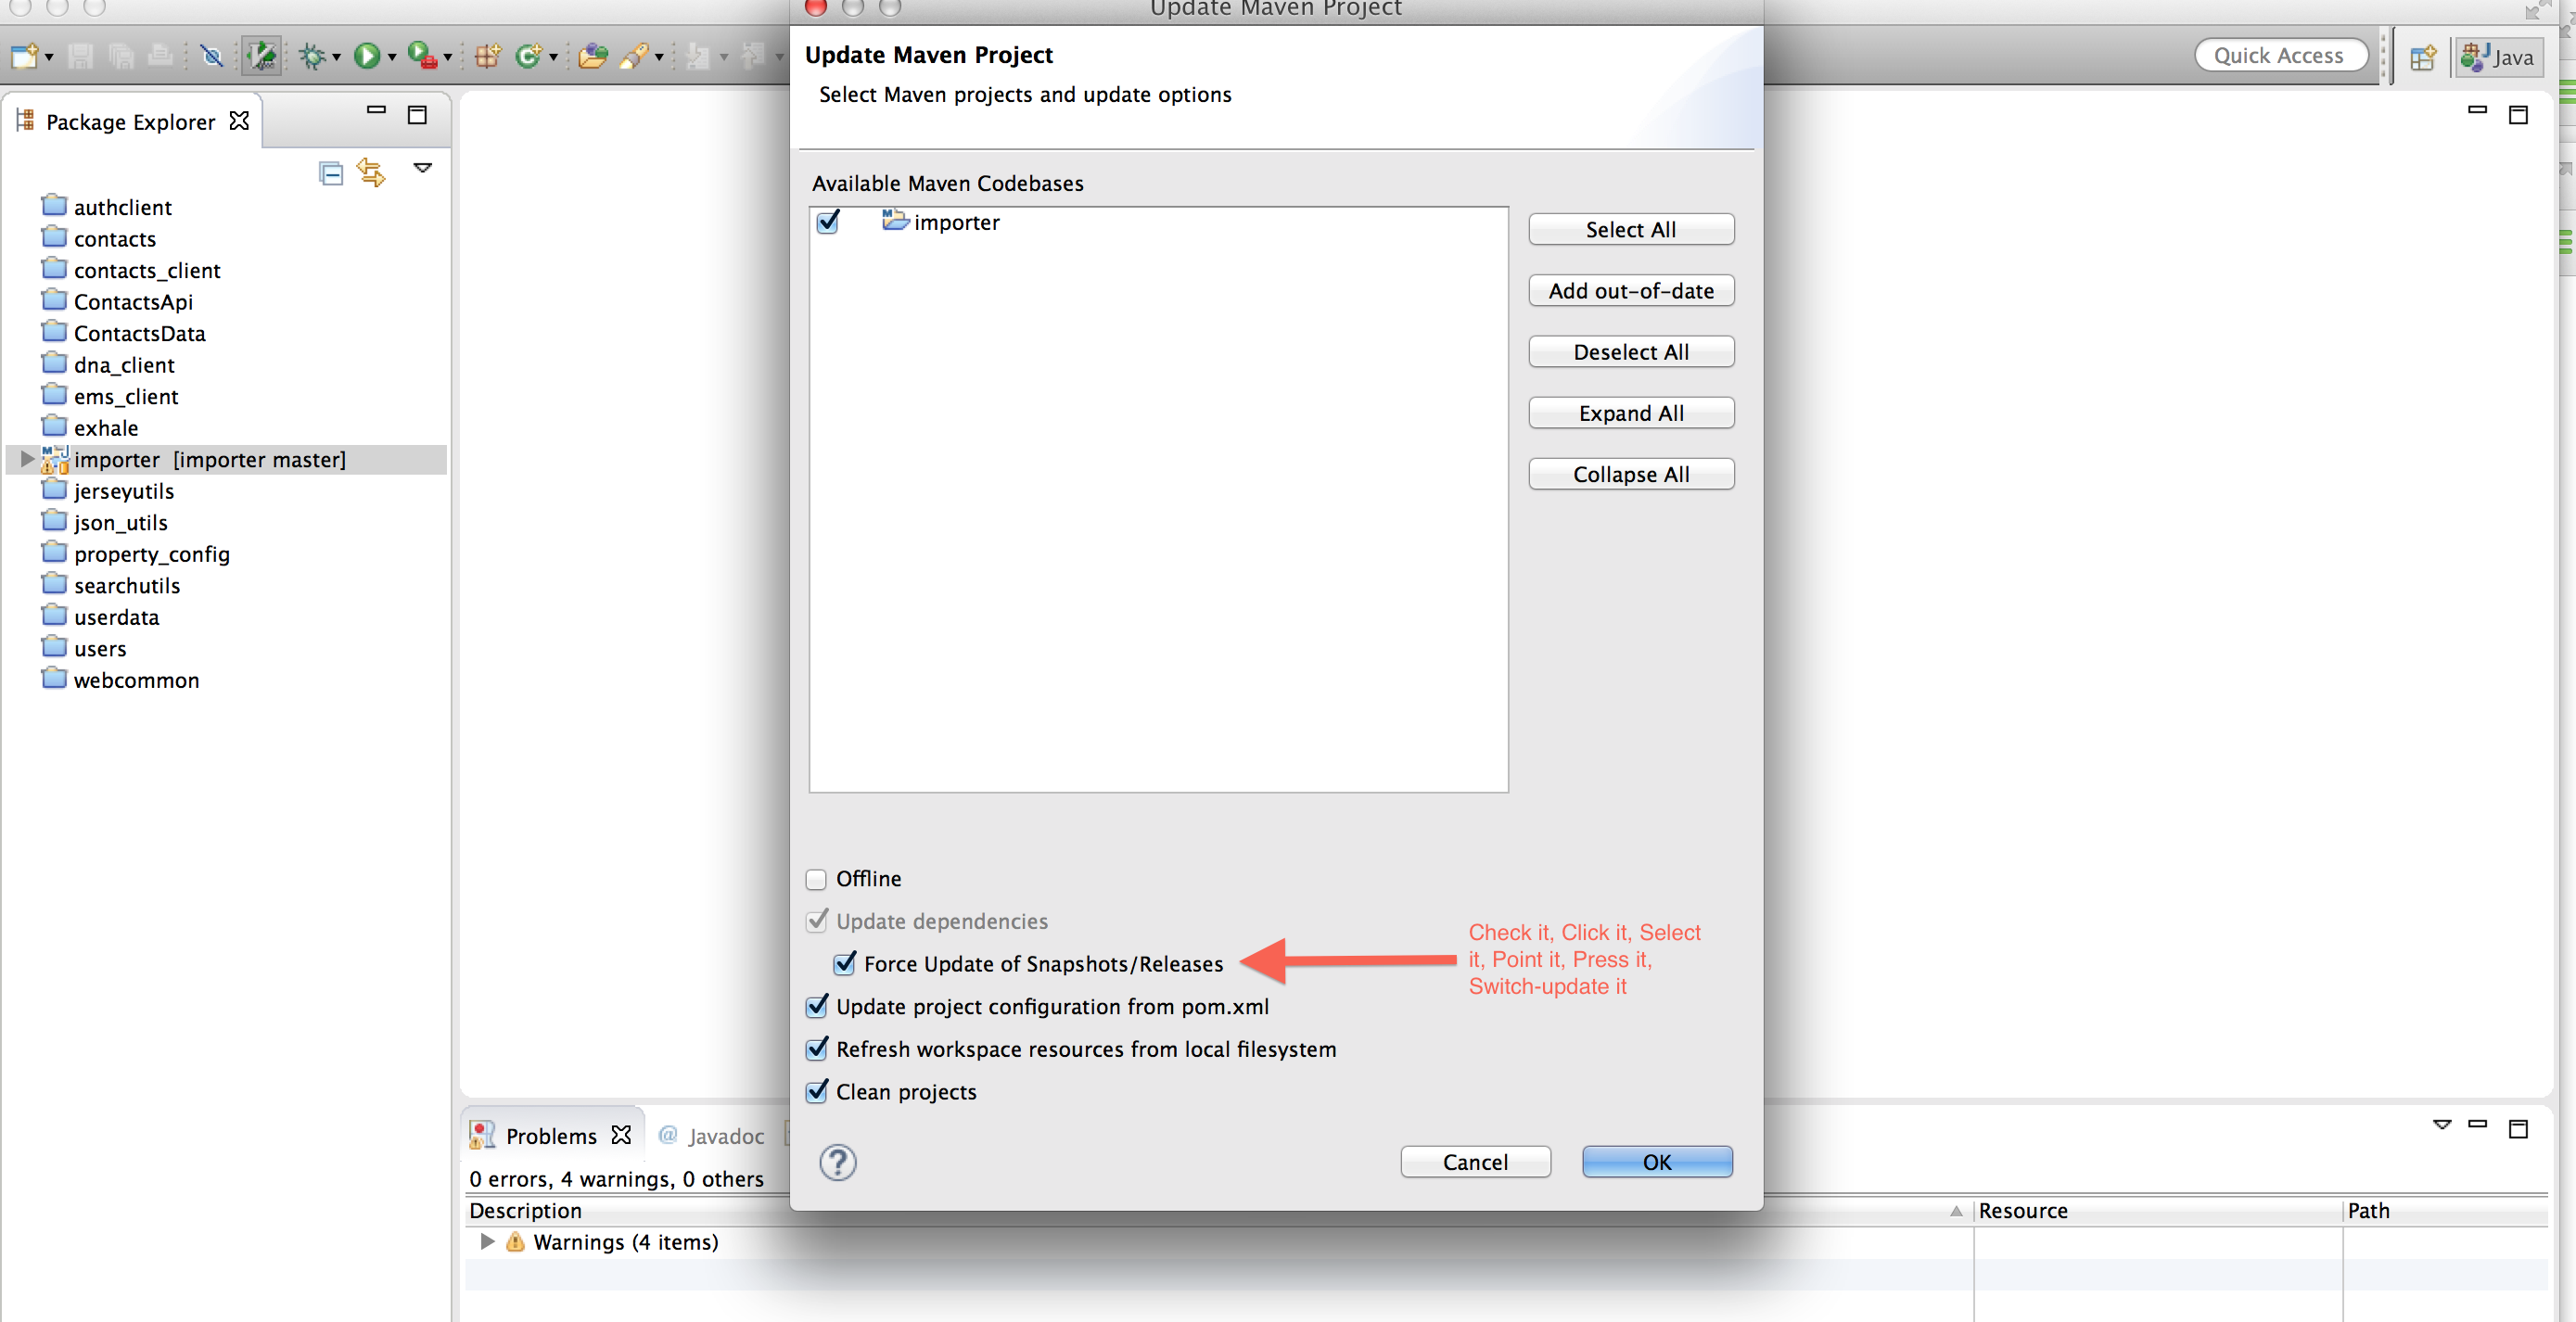
That’s it! You should now have a clean and fully-functioning Jenkins to Archiva automatic deployment system. If for some reason you get dependency issues in Eclipse, make sure you use your Maven plugin to update the project and its dependencies before cursing under your breath and banging your head against the wall.